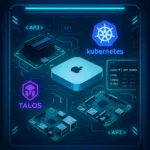
Running Kubernetes on the NVIDIA Jetson Nano with Talos Linux is possible thanks to an official Talos image—but there’s a catch: it doesn’t support the Jetson’s GPU out of the box. Since Talos uses a minimal, secure architecture and NVIDIA’s L4T kernel is heavily customized, enabling GPU acceleration takes extra work. In this 2025 guide, I walk through two methods to get Talos working properly on the Jetson Nano—with GPU support included. One is quick and pragmatic, the other is fully custom and a bit more hardcore. Let’s dive in.
- 🎮 Option 1: The Easy Way — Talos on the Nano (CPU-Only)
- 🔥 Option 2: The Hard Way — JetPack, Custom Scripts, Kernel Rebuild & CUDA Glory
- 📊 Final Comparison: Easy vs. Hard Way
- 📦 Final Thoughts
🎮 Option 1: The Easy Way — Talos on the Nano (CPU-Only)
🔐 Step 0: Flashing the Firmware to On-Board SPI Flash
Before you can even boot your custom kernel—or Talos for that matter—you may need to reprogram the Jetson Nano’s SPI flash. This step is only required once per device, but it’s critical if your Nano has never been flashed before.
We will use the R32.7.2 release for the Jetson Nano along with a patched upstream version of U-Boot from Talos, enabling USB boot.
⚠️ This is a permanent step and may affect booting other OSes like JetPack. Proceed only if you’re committing this Jetson to Talos.
What you’ll need:
- USB-A to Micro USB cable
- Jumper wire to enable recovery mode
- HDMI monitor (optional for boot logs)
- USB to Serial adapter (optional)
- 5V DC barrel jack
1. Download the L4T release and patched bootloader:
curl -SLO https://developer.nvidia.com/downloads/embedded/l4t/r32_release_v7.4/t186/jetson_linux_r32.7.4_aarch64.tbz2
tar xf jetson_linux_r32.7.4_aarch64.tbz2

cd Linux_for_Tegra

crane --platform=linux/arm64 export ghcr.io/siderolabs/sbc-jetson:v0.1.0 - | tar xf - --strip-components=4 -C bootloader/t210ref/p3450-0000/ artifacts/arm64/u-boot/jetson_nano/u-boot.bin
2. Prepare the Jetson Nano for Force Recovery Mode (FRC):
- Power off the Nano
- Leave SD/USB/network disconnected
- Connect the Micro USB cable (but don’t plug it into the PC yet)
- Place a jumper across the FRC pins:
- A02: pins 3–4 of J40
- B01: pins 9–10 of J50
- Place another jumper across J48 (to enable DC jack power)
- Plug in the 5V DC jack (J25)
- Now connect the USB cable to your PC, then remove the FRC jumper
3. Confirm Force Recovery Mode:
lsusb | grep -i nvidiaShould show: NVIDIA Corp. APX
4. Flash the firmware:
sudo ./flash p3448-0000-max-spi externalThis will flash the SPI flash with the custom U-Boot bootloader. Monitor logs on the serial console or HDMI.
Once it completes, power off the Nano. You’re now ready to boot from SD card with Talos or a custom kernel.
sudo ./flash.sh jetson-nano-qspi-sd mmcblk0p1Once this is done, the Nano will be able to boot from SD card with either Talos or a custom Linux kernel.
Talos has an official guide for running on the Jetson Nano. It’s minimal, stable, and integrates directly into your Talos cluster. Perfect if you need a silent little ARM64 node to crunch logs, not tensors.
👉 Official Talos Jetson Nano Guide
Here’s the full process, including the crucial firmware flashing step for first-time setup:
Step 1: Download the Talos Jetson Nano Bundle
curl -LO https://github.com/siderolabs/talos/releases/download/v1.10.1/jetson-nano.tar.gz
tar -xzf jetson-nano.tar.gz
You should now have:
image.tar— the Talos OS root filesystemjetson-nano-bootloader.img— the special NVIDIA boot image
Step 2: Flash the Talos OS to a microSD Card
tar -xvf image.tar
sudo dd if=metal-arm64.img of=/dev/sdX bs=4M conv=fsync status=progress
Replace /dev/sdX with your actual SD card device.
Boot It Up
Insert the SD card, power on, and let Talos silently boot. Use your router or nmap to discover the device’s IP.
Generate a Config
talosctl gen config home-cluster https://<CONTROL-PLANE-IP>:6443Apply the Config
talosctl apply-config \
  --nodes <JETSON-IP> \
  --file worker.yaml
Bootstrap or Join
If it’s your first node:
talosctl bootstrapOtherwise:
kubectl get nodes✅ What You Get
- Lightweight ARM64 Kubernetes node
- No SSH, fully Talos-managed
- Great for CPU workloads
❌ What You Don’t Get
- No access to
/dev/nvhost-* - No CUDA, no GPU acceleration
If you want GPU, it’s time for…
🔥 Option 2: The Hard Way — JetPack, Custom Scripts, Kernel Rebuild & CUDA Glory
This section is now structured as a step-by-step guide you can follow from start to finish:
🛠️ Prerequisites
Before diving in, you need to know that the default Jetson Nano kernel lacks several critical features required by Kubernetes. Things like netfilter support for kube-proxy, iSCSI modules for persistent volumes, and NFS support are missing. To fix this, we need to build and deploy a custom kernel.
🔧 Why recompile the kernel?
- The default L4T 4.9.337 kernel is too minimal.
- Missing modules like
xt_NFACCTbreak kube-proxy. - Advanced CNI plugins need
bridge_netfilter,VXLAN, and more. - Storage plugins need
iSCSI_TCP,NFS_V4_1, etc.
So part of the “hard way” includes rebuilding the kernel with Kubernetes support baked in.
📚 I wrote a full guide just for this: 👉 Jetson Nano Kubernetes Kernel Guide
In summary, the process involves:
- Backing up your existing kernel and modules
- Cross-compiling a fresh kernel with all the right config
- Safely deploying and validating the new kernel
Once you’re done with that, you can continue with the steps below to integrate the Nano into your Talos cluster.
- A running Talos Kubernetes cluster (control plane + at least one worker)
- A Jetson Nano flashed with JetPack 4.6
- Basic networking between nodes
- SSH access to the Nano
🧪 Step 1: Prepare the Jetson Nano
- Flash JetPack 4.6 onto an SD card using the NVIDIA SDK Manager.
- Boot up the Jetson Nano and complete the initial setup process.
- Disable Docker and enable containerd by running these commands:
sudo systemctl disable docker --now
sudo systemctl enable containerd --now- Install the NVIDIA container runtime:
sudo apt install nvidia-container-runtime- Configure containerd to use the NVIDIA runtime by editing the file
/etc/containerd/config.toml. Add the following section:
[plugins."io.containerd.grpc.v1.cri".containerd.runtimes.nvidia]
  runtime_type = "io.containerd.runc.v1"
  [plugins."io.containerd.grpc.v1.cri".containerd.runtimes.nvidia.options]
Runtime = "nvidia"- Restart containerd to apply the changes:
sudo systemctl restart containerdWould you like me to forma
🔐 Step 2: Join the Cluster Without kubeadm
You’ll need certificates and kubelet config from the Talos control plane. I automated this via a custom script:
bash jetson-join-cluster.shThis script:
- Copies the Talos cluster’s CA and TLS certs
- Sets up the kubelet config and static pod manifests
- Installs a kubelet systemd unit
- Configures network settings (CNI, sysctl)
🌐 Step 3: Install CNI Plugins (Flannel + Friends)
After your Jetson Nano has a working Kubernetes-aware kernel, the next roadblock is networking. By default, Kubernetes expects a Container Network Interface (CNI) plugin to be installed. Without it, your pods will just sit there “ContainerCreating” forever like sad, IP-less ghosts.
If you’re joining a cluster managed by Talos, the control plane nodes already come with a working CNI setup (usually Flannel). But Talos won’t provision CNIs on non-Talos nodes, which means your Jetson will need the CNI plugins installed manually.
🧰 What you need:
- The CNI plugin binaries (e.g., bridge, host-local, loopback)
- The Flannel binary (compiled for ARM64)
- A working CNI config (copied from a Talos worker or created manually)
- The correct directories:
/opt/cni/bin/— for plugin binaries/etc/cni/net.d/— for configuration files
🔧 Install the Plugins
- Download the latest CNI plugins (ARM64):
ARCH=arm64
VERSION=v1.3.0
curl -L -o cni-plugins.tgz https://github.com/containernetworking/plugins/releases/download/$VERSION/cni-plugins-linux-$ARCH-$VERSION.tgz
sudo mkdir -p /opt/cni/bin
sudo tar -C /opt/cni/bin -xzf cni-plugins.tgz- Install Flannel (optional but recommended for Talos clusters):
curl -L -o flanneld https://github.com/flannel-io/flannel/releases/download/v0.24.2/flanneld-arm64
chmod +x flanneld
sudo mv flanneld /usr/local/bin/
Note: You may not need the
flanneldbinary if Flannel is only being run on the control plane. But it’s good to have for debugging.
- Add your CNI config (copy it from a Talos worker or write a basic one like this):
{
  "cniVersion": "0.3.1",
  "name": "podnet",
  "type": "bridge",
  "bridge": "cni0",
  "isGateway": true,
  "ipMasq": true,
  "ipam": {
    "type": "host-local",
    "subnet": "10.244.0.0/16",
    "routes": [
      { "dst": "0.0.0.0/0" }
    ]
  }
}
Save this to /etc/cni/net.d/10-flannel.conflist.
🎮 Step 4: Enable GPU Runtime in Pods
Now that your kernel is ready and your Jetson Nano is networked into the cluster, it’s time to unlock its real superpower: the GPU.
By default, Kubernetes doesn’t know how to talk to the GPU on a Jetson board — and to make it worse, Jetson doesn’t expose the usual /dev/nvidia* devices like a desktop GPU would. Instead, we have to deal with /dev/nvhost-*, /dev/nvgpu, and a few other quirks of the Tegra platform.
This step ensures your containers can access the GPU and CUDA libraries when needed.
🧰 Prerequisites
- JetPack 4.6 is installed on the Jetson (this gives you CUDA 10.2 and the Tegra drivers).
- You’ve already installed
nvidia-container-runtime. - You’ve already patched containerd to support the NVIDIA runtime.
🧩 1. Verify Device Access
Inside the Jetson Nano, you should see the following:
ls /dev/nvhost-*
ls /dev/nvgpu
If these are missing, your kernel or drivers might not be fully initialized.
🛠️ 2. Patch containerd for NVIDIA runtime
In your /etc/containerd/config.toml, add the following runtime block under [plugins."io.containerd.grpc.v1.cri".containerd.runtimes]:
[nvidia]
  runtime_type = "io.containerd.runc.v1"
  [nvidia.options]
    Runtime = "nvidia"
Restart containerd:
sudo systemctl restart containerd🧪 3. Test with a CUDA-enabled container
Note:
nvidia-smiwill NOT work on Jetson — use this instead:
docker run --rm --runtime=nvidia -e LD_LIBRARY_PATH=/usr/local/cuda/lib64 nvcr.io/nvidia/l4t-pytorch:r32.7.1-pth1.10-py3 python3 -c "import torch; print(torch.cuda.is_available())"Expected output:
TrueThis means your container can access the Jetson’s GPU and CUDA is working.
📦 4. Set RuntimeClass for Kubernetes
To run GPU containers in Kubernetes, define a RuntimeClass for NVIDIA:
apiVersion: node.k8s.io/v1
kind: RuntimeClass
metadata:
  name: nvidia
handler: nvidia
Then add this to your pod spec:
spec:
  runtimeClassName: nvidia
💡 Bonus: NVIDIA Device Plugin (Minimal Mode)
Jetson Nano isn’t fully compatible with NVIDIA’s official device plugin:
✅ What works:
- Manually mounting
/dev/nvhost-* - Custom DaemonSet without NVML
⚠️ What doesn’t:
- Automatic device discovery
nvidia-smi
To expose GPU scheduling to Kubernetes:
- Set
resources.limits/requests: nvidia.com/gpu: 1 - Use
nvidiaruntimeClass - Patch your CSV to point to
/usr/local/cuda/lib64and friends
📊 Final Comparison: Easy vs. Hard Way
Now that you’ve seen both approaches, here’s a side-by-side breakdown to help you decide which route fits your goals and patience level.
| Feature | Easy Way (Talos) | Hard Way (JetPack + Manual) |
|---|---|---|
| GPU Access | ❌ None | ✅ Full CUDA acceleration |
| Talos-Managed | ✅ Yes | ❌ No |
| Installation Time | ⏱️ 15–30 min | ⏱️ 3–5 hours (with build time) |
| Requires Kernel Rebuild | ❌ No | ✅ Yes (for kube-proxy, CNI, etc.) |
| Kubernetes Integration Effort | 🔧 Minimal | 🛠️ Complex (manual join script) |
| Future Maintenance | 🧼 Easy via Talos upgrades | 😬 Manual updates required |
| Suitable for Production Cluster | ✅ Absolutely | ⚠️ With caution |
| Fun Level | 😐 Plug and play | 🤘 For hardcore DIY fans |
TL;DR
- Choose Option 1 if you want a quick, reliable, low-maintenance ARM64 node.
- Choose Option 2 if you absolutely need the GPU and love solving kernel puzzles at 2am.
📦 Final Thoughts
This guide took some trial and error, but the end result was worth it: a GPU-enabled Jetson Nano humming away inside a Talos Kubernetes cluster.
If you’ve got a Nano collecting dust, this is your sign. Run an LLM, deploy an AI camera, or just join the Kubernetes dark arts.
Next: the full join script, troubleshooting GPU pods, and monitoring Jetson workloads with Prometheus. 🚀
Software enthusiast with a passion for AI, edge computing, and building intelligent SaaS solutions. Experienced in cloud computing and infrastructure, with a track record of contributing to multiple tech companies in Silicon Valley. Always exploring how emerging technologies can drive real-world impact, from the cloud to the edge.